Old Bones, New Tricks: Dressing Up a Period Home with Picture Rails and Gallery Hanging Systems
If your home has picture rails, don’t rip them out — put them to work. That narrow strip of moulding running around…
If your home has picture rails, don’t rip them out — put them to work. That narrow strip of moulding running around the room a foot or so below the ceiling was designed for exactly one job: hanging art without ever touching the plaster underneath. Pair it with modern gallery hanging hardware — the steel cables, hooks, and brass fittings you see in museums — and you get a system that’s more flexible, more forgiving, and honestly more elegant than anything a drill and a wall anchor can offer.
Here’s how it works, and how to make it look intentional rather than like an afterthought.
Why picture rails exist in the first place
Picture rails were standard in homes built before the mid-20th century, back when walls were often lime plaster over lath — a surface that doesn’t take kindly to nails, and one that’s expensive and messy to patch if you get it wrong. Rather than risk the wall, homeowners hung a moulded timber rail near the cornice and hung everything from it instead, using cord or wire and a simple hook that sat over the top of the rail.
The genius of the system is that it’s entirely non-destructive. No holes, no anchors, no wall filler. If a picture rail is original to your home, it’s a small piece of the building’s history — and reviving its intended use is one of the simplest ways to make an older home feel authentic rather than renovated into blandness.
Modern gallery hooks bring the system up to date
The rail itself hasn’t changed much, but the hardware has. Modern gallery hanging kits swap the old cord for fine steel cable, and the simple brass hook for a sleek, low-profile rail hook that clips over the moulding and barely registers visually. A small adjustable gripper or looped fitting at the bottom of the cable lets you set the exact height of the artwork and fine-tune it later without re-hanging anything.
A few things this hardware does well that old-school picture-hanging cord never could:
● Adjustable height on the fly. Slide the gripper up or down the cable to raise or lower a piece — useful when you’re deciding on a gallery wall, or when furniture underneath changes.
● Load capacity for heavy pieces. Steel cable rated for real weight means you can hang substantial mirrors, framed textiles, or multi-panel artwork without worrying about a single nail giving way.
● Multiple cables per piece. Wider or heavier items — a large mirror, a big framed print, a hanging textile — can be supported from two or more points along the rail, which keeps them level and stable.
● Reversible, always. Move house, redecorate, or simply change your mind, and there’s no patching required. Unhook, adjust, rehang.
What this looks like in practice
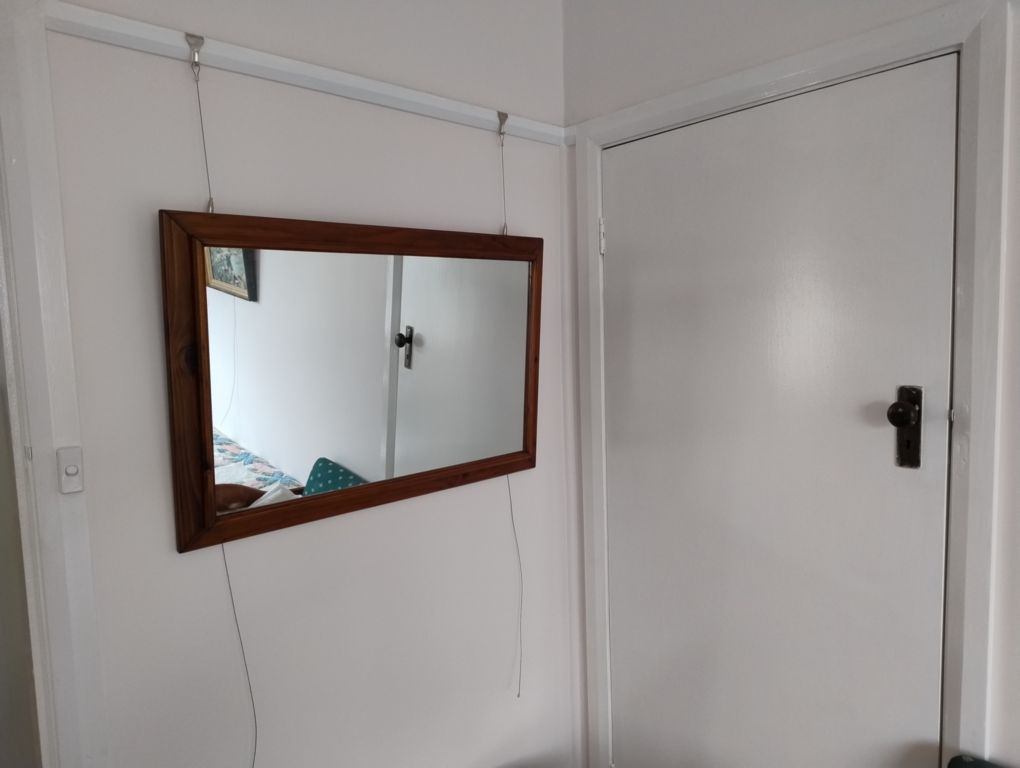
A simple wood-framed mirror hung from twin cables clipped to ceiling-height hooks shows the system at its most basic: two hooks, two lengths of cable, and a mirror that can be nudged left, right, higher, or lower in seconds. Because the cable takes the load rather than a wall fixing, even a fairly substantial mirror hangs securely with minimal visible hardware.
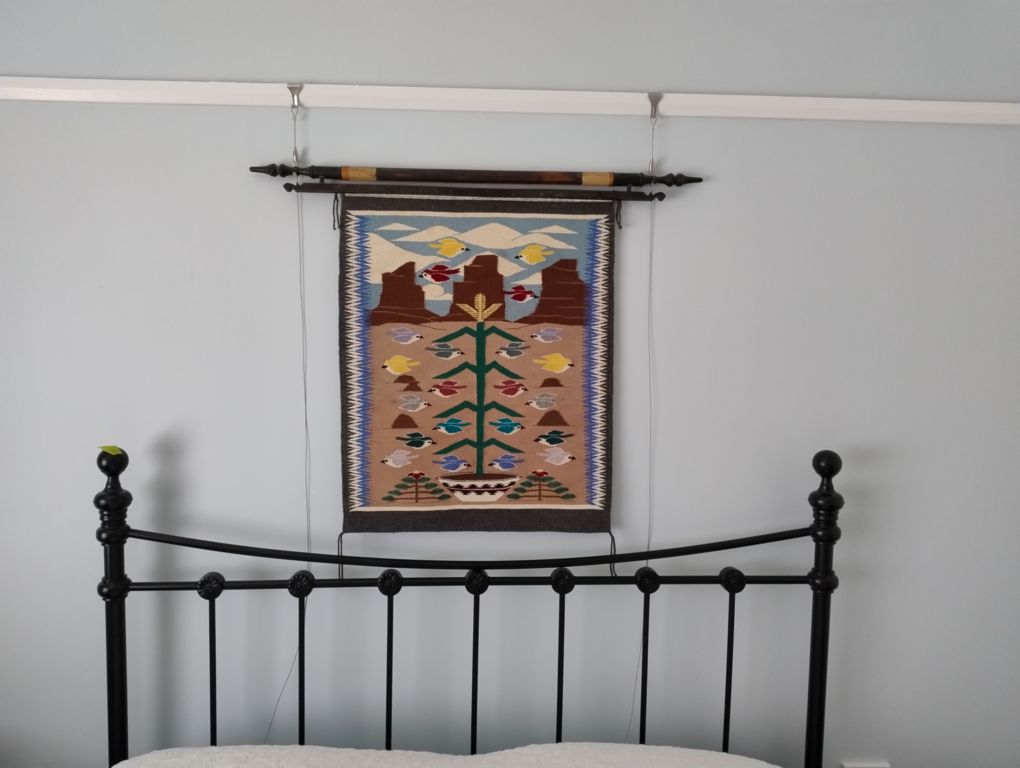
The same approach scales up beautifully for less conventional pieces. A woven wall hanging suspended from a wooden dowel is a good example — rather than fuss with backing boards or wall brackets, two cables run straight from the rail down to the ends of the dowel, letting the textile hang naturally, the way it would in a gallery.
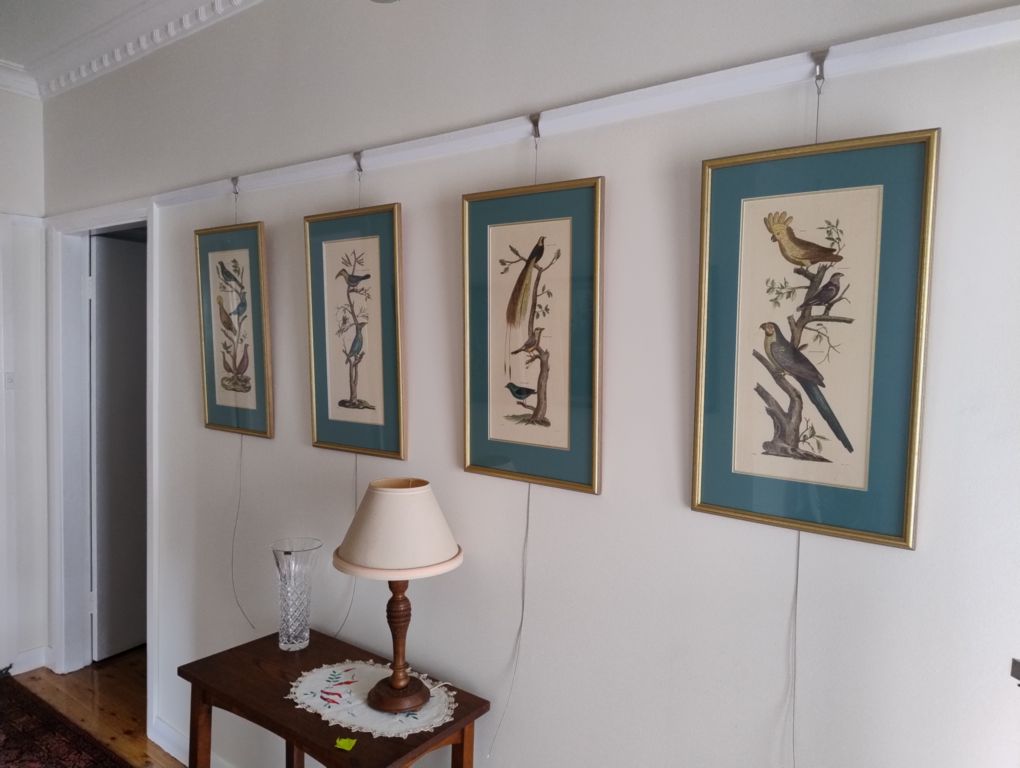
For a run of smaller framed prints along a hallway, individual cables from a continuous rail let each piece hang independently, evenly spaced but each fine-tuned to its own perfect height — ideal for a matched set of framed prints that need to line up visually without actually being fixed to a shared bracket.
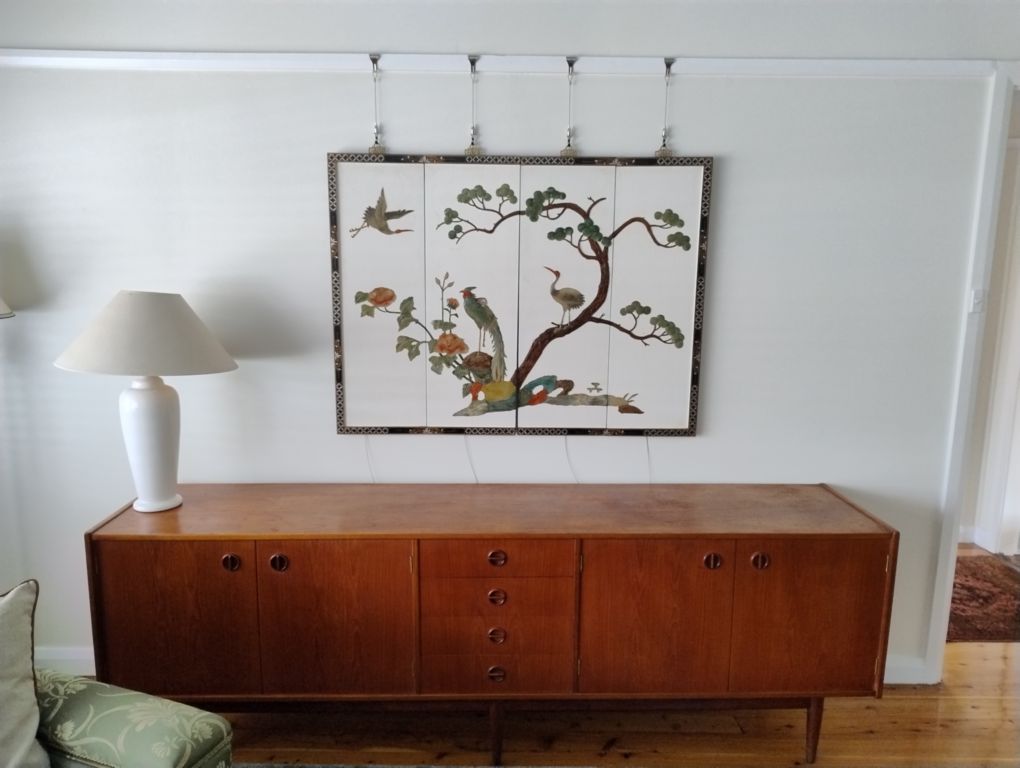
And for genuinely oversized or unusually shaped pieces — think a wide, multi-panel folding screen or painted panel artwork mounted flat against the wall above a credenza — four separate cable drops distribute the weight across the full width of the piece, which keeps a large, heavy item stable and perfectly level even though it’s taller than it is easy to lift.
Tips for getting the look right
● Let the cable be part of the design, not something to hide. Fine steel cable is unobtrusive by design, but trying to conceal it usually looks more awkward than just letting it run cleanly from rail to frame. A taut, straight cable reads as intentional; a slack or crooked one reads as an afterthought.
● Match hook spacing to the width of the piece. For anything wider than about 60cm, use two hooks and two cables rather than one central point — it keeps the piece from twisting and looks more balanced from below.
● Use the rail’s original position as your top guide, not your only option. You don’t have to hang everything at rail height. Adjustable cable grippers mean you can bring a piece down to a more conventional eye-level height while still anchoring at the rail — best of both worlds.
● Mix formats with confidence. Because nothing is fixed to the wall, it’s low-risk to hang a mirror, a textile, and a set of framed prints all from the same rail in one room. If a grouping doesn’t work, changing it costs you five minutes, not a weekend of wall repair.
The bigger picture
There’s something quietly satisfying about using a period feature exactly as it was designed to be used, just with better hardware. Picture rails were a practical solution to a real problem — protecting plaster walls — and they still solve that problem today, just with steel cable instead of cord and cleaner-lined hooks instead of ornate brass ones. For anyone living in an older home, it’s one of the few upgrades that respects the building’s original character while making everyday life (rearranging art, swapping seasonal decor, adjusting a gallery wall) genuinely easier.
If you’ve got picture rails and a box of frames you haven’t hung yet, this is your sign to get the hardware out.