Building a Low-Level Floating Deck
A Practical Backyard Upgrade There’s something satisfying about turning an unfriendly concrete slab into a warm, functional outdoor space. This project started…
A Practical Backyard Upgrade
There’s something satisfying about turning an unfriendly concrete slab into a warm, functional outdoor space. This project started as a plain, slightly awkward patio area and ended as a clean, level timber deck that completely transforms the backyard.
Here’s a walkthrough of how it came together—from frame to finish—and a few lessons worth knowing if you’re tackling something similar.
Starting with the Base
The existing surface was a concrete slab, which is actually a great foundation to work with. It provides stability, drainage, and eliminates the need for digging footings.
Before anything else, the area was cleaned and checked for level. Minor variations in the slab were accounted for during the framing stage rather than trying to correct the concrete itself.
Building the Frame
The frame is the backbone of any deck, and in this case, it was constructed using treated pine to handle outdoor exposure.
A grid-style frame was used, with joists running both directions to create a solid, evenly supported structure. This approach is especially useful for low-profile decks where height is limited and you want to minimize bounce or flex.
Key points during framing:
- Consistent spacing ensures the decking boards won’t sag over time
- Square layout is critical—if the frame is out, everything else will be too
- Fixing to the slab (where needed) helps prevent movement
Because the deck sits low, keeping everything tight and well-supported was essential.
Working Around Existing Features
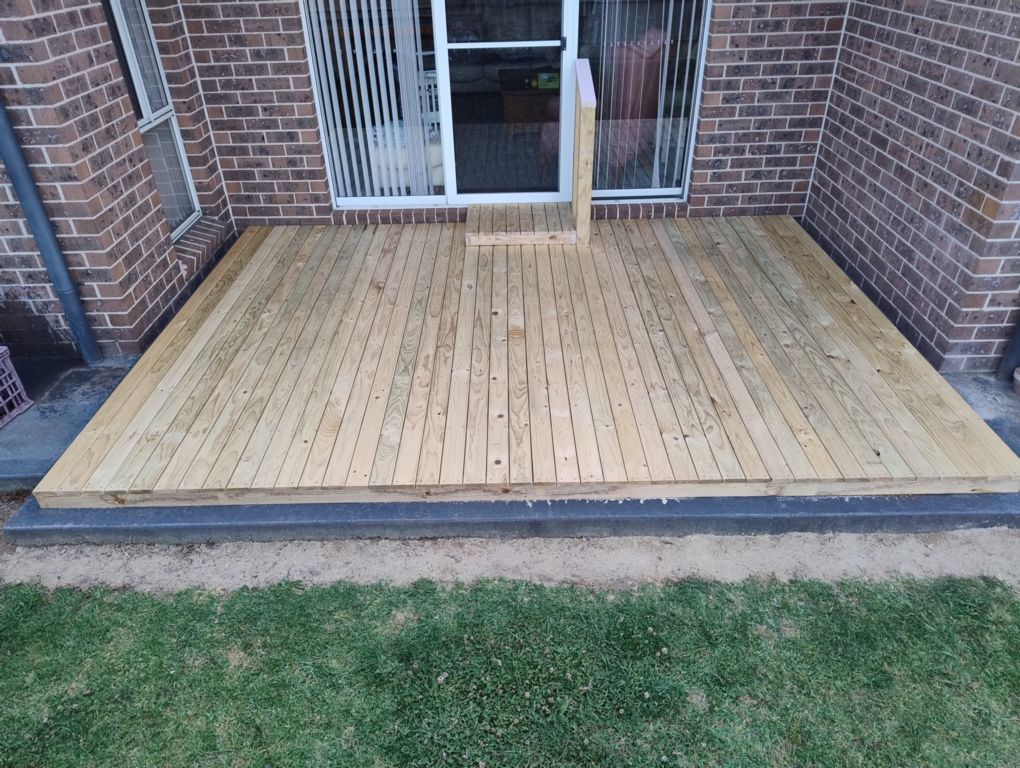
One of the more interesting aspects of this build was working around the sliding door and step area.
Instead of forcing a one-size-fits-all layout, a small raised section and frame detail were built to integrate neatly with the doorway. This not only improves access but makes the final result look intentional rather than “added on.”
Laying the Decking Boards
Once the frame was complete, the transformation really started.
Decking boards were laid perpendicular to the joists, creating a clean, linear look that visually widens the space. Each board was:
- Spaced evenly for drainage and expansion
- Fixed securely to prevent movement
- Aligned carefully to keep the lines straight across the entire deck
Taking time here makes a huge difference—the eye picks up inconsistencies quickly on a finished deck.
The Finished Result
The difference is night and day.
What was once a bare slab is now a usable outdoor area that feels like an extension of the home. The timber softens the space, adds warmth, and makes it far more inviting for entertaining or just relaxing outside.
Lessons from the Build
A few takeaways if you’re planning something similar:
- Prep matters – A solid, level base saves headaches later
- Don’t rush the frame – It determines how everything sits and feels
- Think through transitions – Doors, steps, and edges need extra attention
- Measure twice (or three times) – Small errors compound quickly
Final Thoughts
This kind of project is a great example of how a relatively straightforward build can have a big impact. With the right planning and attention to detail, a simple deck can completely change how a space is used.
And as a bonus—it’s one of those jobs where you can step back at the end of the day and clearly see the result of your work.
Not a bad payoff for a few days on the tools.